
As part of my outfit for the Project $0 over on Winter Wanderings and Whatnot I made this cute little up-cycled Ruffle Peplum. Here is a tutorial showing how I did it. (Bear with me, I am self taught and make up my own terms for things sometimes).
Please excuse the dark phone photos. I mainly get free time for sewing late at night when the kids are in bed so I take photos with my phone and the lighting is terrible.
I decided to use the Tinny as the basis for my bodice. I love the fit of the Tinny on Eloise. That said, you could use any bodice you have in your collection. The Tinny is designed to have sleeves and a neck facing but I decided to make it fully lined instead.
I kept the front pattern piece unchanged but folded 3/8" of the centre back seam under because the shirt already has buttons/buttonholes. I lined my new centre seam up with the centre of the button placket. I think the most important part of placement on the shirt is working out the height of the top button (and don't forget to allow for the seam allowance when deciding on placement).

I then cut the same pieces from some white poplin I had in my stash. I sewed the fronts and backs together at the shoulder seams and pressed the seams open. Then, as shown in the third pic across below, I placed them right sides facing and pinned the armholes and neck opening. I folded the lining back along the side of the button placket. Then I sewed these seams and clipped the curves. I turned it right side out and ironed it flat (my pic is pre-ironing).
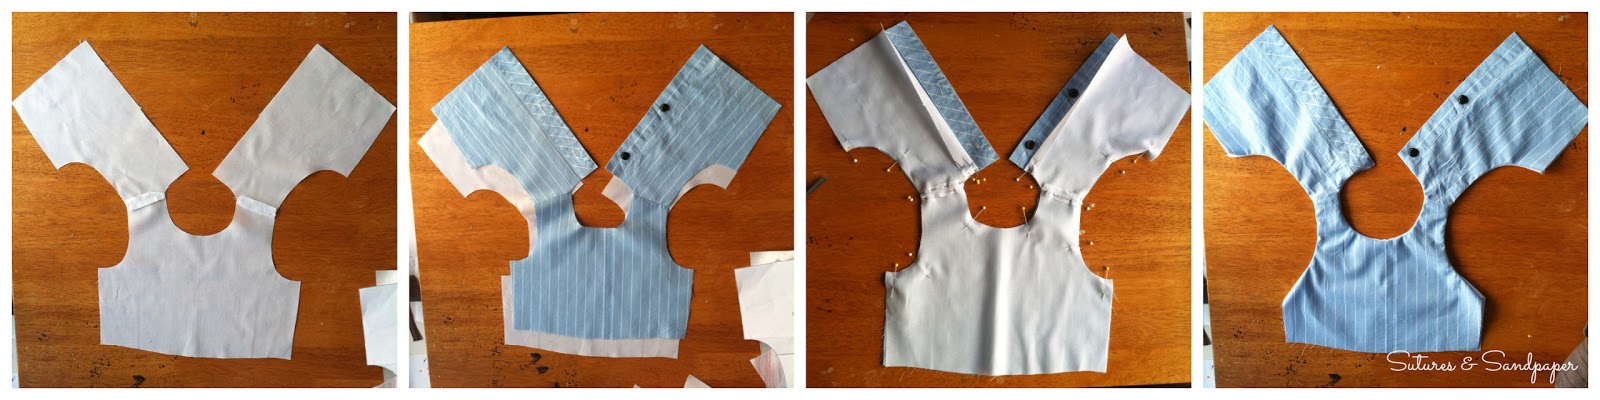
Next it is time to top-stitch the neck opening. The pic below shows how I dealt with the raw top of the button placket at the back. I folded it under twice and then when I top stitched the neck line is enclosed that raw edge. Another way would be to use bias binding around the neck opening.

While the back was still open I then lined up the bodice's side seams (under the arms). You should have lining right sides facing and main fabric right sides facing. It is important to match up the seam in the middle. Once this is sewn you need to clip the part where the seams meet in the middle, then press the seams open and fold it back down so that the wrong sides of the lining are against the wrong sides of the main fabric.

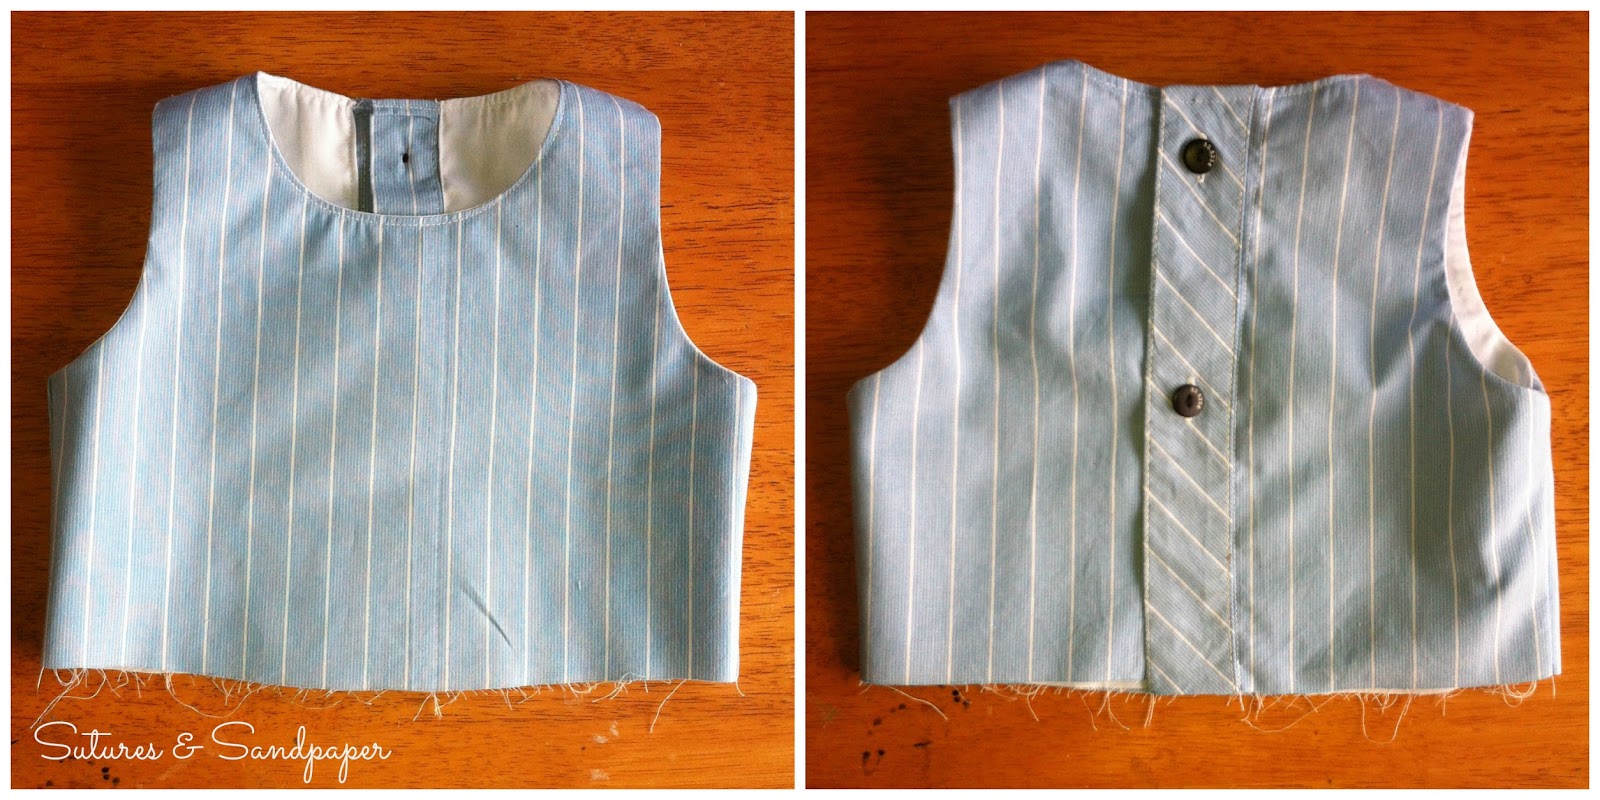
Now take the centre back of the lining and fold it under along the side of the button placket. Then edge stitch the lining to the main fabric

Yay!! The bodice is finished :)
Have I mentioned I LOVE the Tinny bodice?
Time to add ruffles. I cut two strips of the shirt (full width). One was 1.75" and the other was 3.5". In hindsight I should have added a seam allowance to each piece so that the finished length of the shorter one was half of the longer one. Sooo... If I was you (or I was still me but doing it again) I would make them more like 2 3/8" and 4 3/8" so they would end up longer and more even. Also I made this for an 18month old. The ruffles would need to be longer for bigger sizes. I suggest making the bodice then seeing where it sits and measuring the length you want to add and working it out from there.
Clear as mud?? Please ask questions if I'm not making sense :/
So, back to the ruffles. Once you have cut them you need to finish the bottoms of them. I chose to use my overlocker (serger) to do rolled hems. You can finish them however you please but remember to add to the length if you are doing a regular hem. Once they were hemmed I then lined them up at their tops and overlocked them together with the needle tensions turned up to 9. This finished the raw edge, joined them together and gathered them at the same time. Mine didn't turn out gathered enough so I gathered them further by hand. I left the little button placket parts un-gathered so they would sit flat. Then I pinned and pinned and pinned to keep the gathers as even as possible (I lined up the centre of the ruffles with the centre front of the bodice). I attached them to the bodice using my sewing machine but then ran it through the overlocker to reinforce it and finish the raw edge of the bodice.

Now the last step...
I ironed the ruffle seam up towards the bodice and then top-stitched the bottom edge of the bodice.

I think it would look good with a flower embellishment or a ribbon or trim around the bottom of the bodice - or along the bottoms of the ruffles for that matter. I'd love to know if you make one up and see a pic so please link up your pictures/blog in the comments.
As I said if you have any questions or notice any errors (likely) please comment so I can fix it up so it makes more sense for others.
Kerry xx
No comments:
Post a Comment